Product Overview
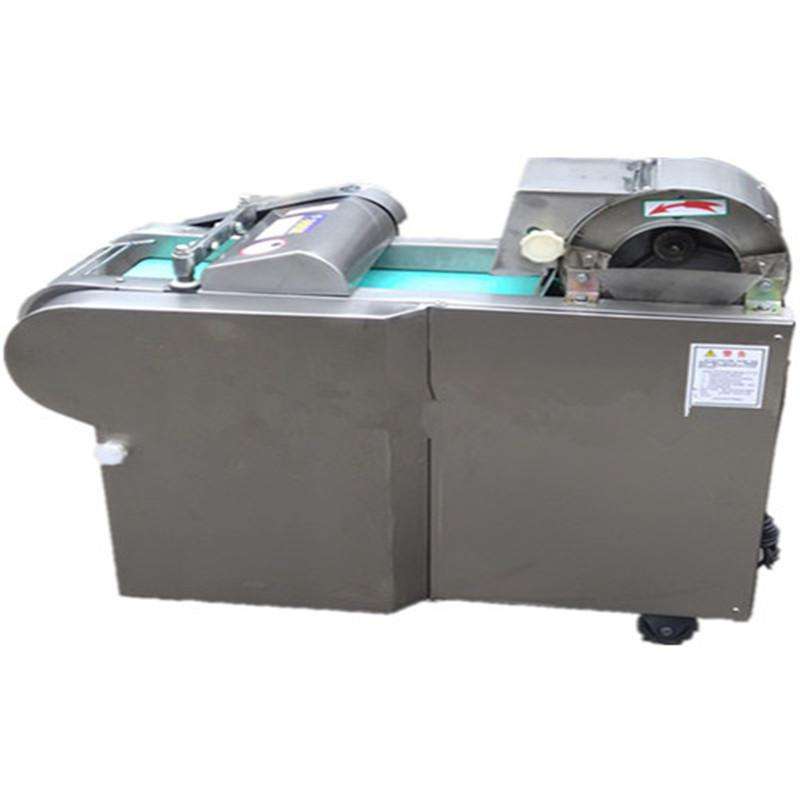
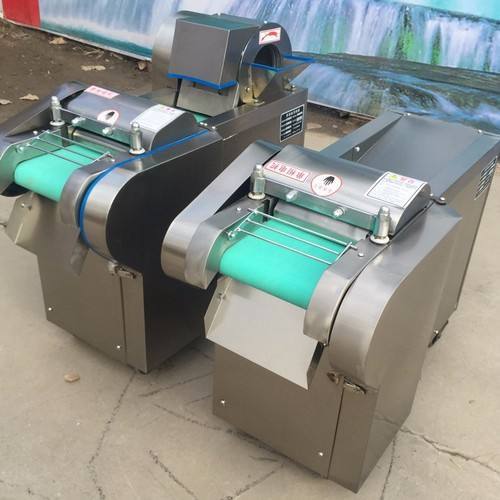
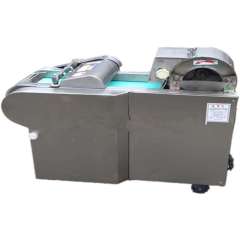
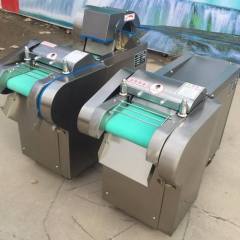
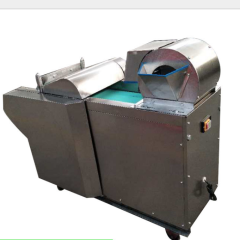
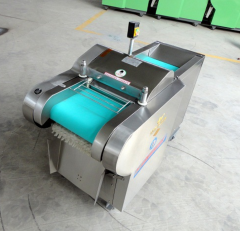
Fresh produce prep is the slowest, most repetitive job in most kitchens and packing rooms, and it is where cut quality quietly drifts as the shift goes on. This machine moves the work onto a belt: produce is loaded into the feed hopper, carried under a rotating blade set and discharged already cut. The blade set decides the shape, so one frame covers the jobs that would otherwise be spread across several bench stations. As a commercial vegetable cutting machine it is built to sit inside a working room rather than beside it. The frame is compact, the belt runs at working height, and the discharge drops product where a tub or the next conveyor can take it. Nothing about the layout assumes a dedicated cutting hall. The range covers a compact single-shift frame and a wider-belt model for continuous production, with the same blade interface across both. A restaurant group buying one unit and a frozen vegetable plant buying a second machine for peak weeks are working with the same design. That is why it suits operations running several products on one line rather than one product all day. It replaces the bench crew most operations keep for chopping, and it makes the cut repeatable from the first tray to the last — which is the part that matters once portion cost and pack weight are on the line. Commercial kitchens and catering operations can prepare chili, cabbage, celery and onion quickly, while multi-shape cutting supports menus that call for strips, cubes or shreds. Automated processing helps reduce labor and keep portion sizes consistent.
Frame, Hygiene & Line Fit
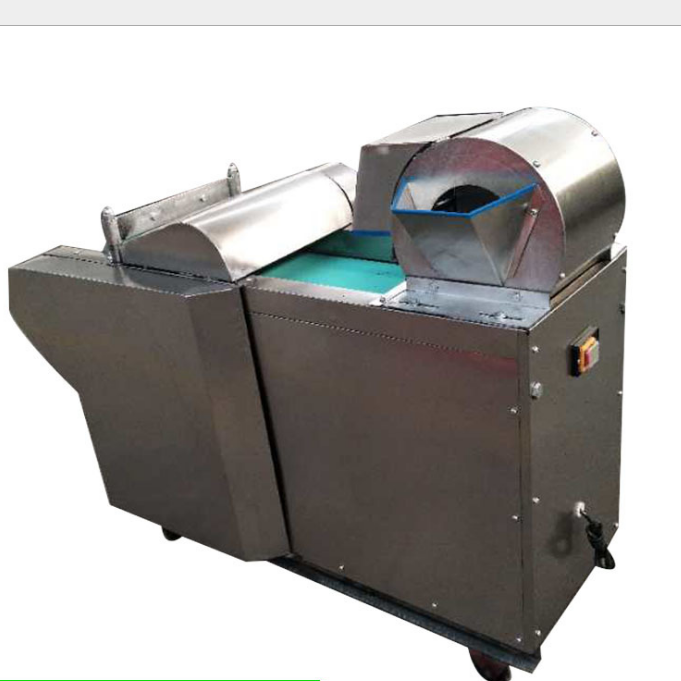
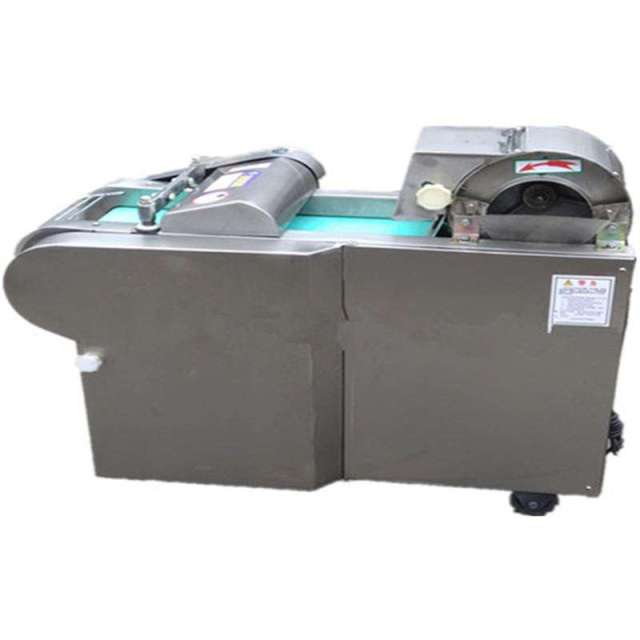
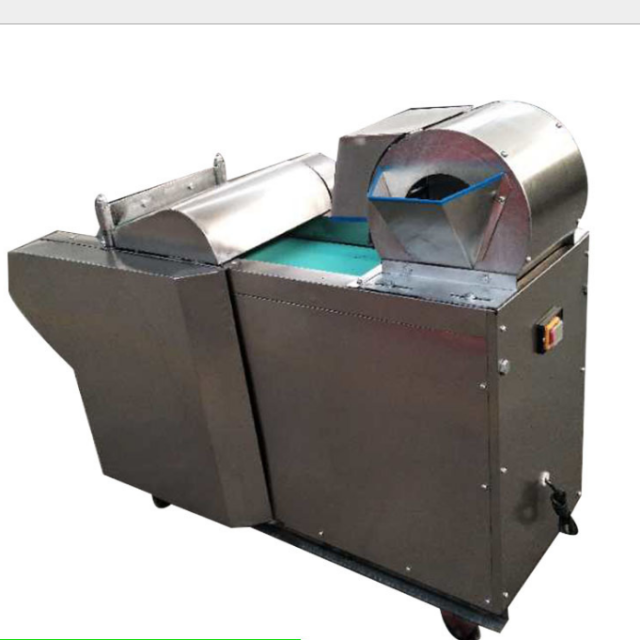
The frame is a rigid box, not a folded panel shell. The belt, the blade housing and the discharge chute all mount to it, which is why the machine keeps its alignment when produce is tipped in heavily rather than fed politely.
The food-contact parts are 304 food-grade stainless steel, and the surfaces that see the most washing sit proud of the frame so a cloth and a hose reach them without dismantling anything. The brushed finish hides the scuffs a working room puts on a machine, and it does not chip or flake the way painted panels do.
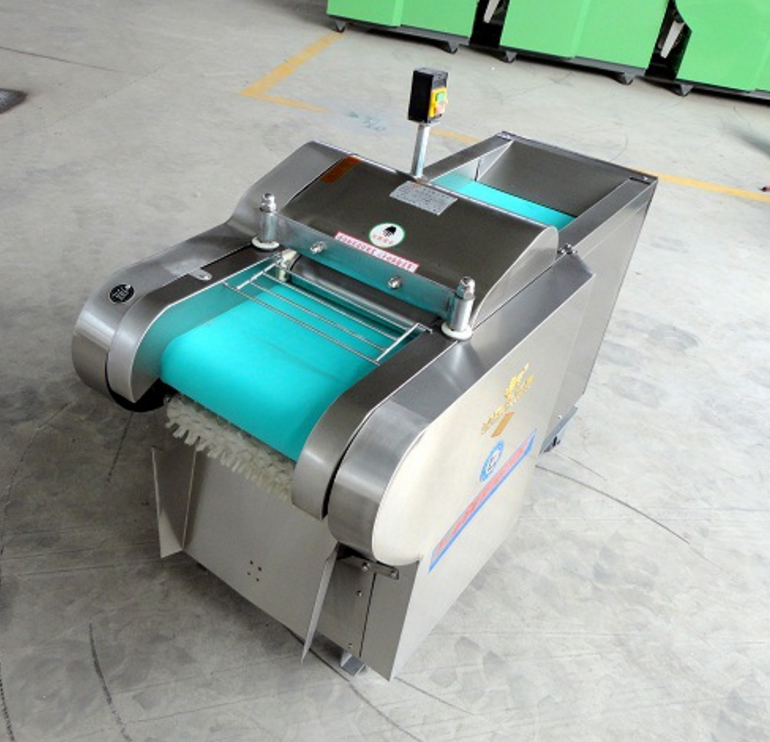
The feed area stays open, with a hinged guard over the blade housing. The guard lifts clear for a blade change and drops back into position, and the control switch sits at the side of the machine where the operator can reach it without leaning across the belt.
The discharge chute is shaped to drop product straight into a tub, a trolley or the next conveyor instead of scattering it across the floor.
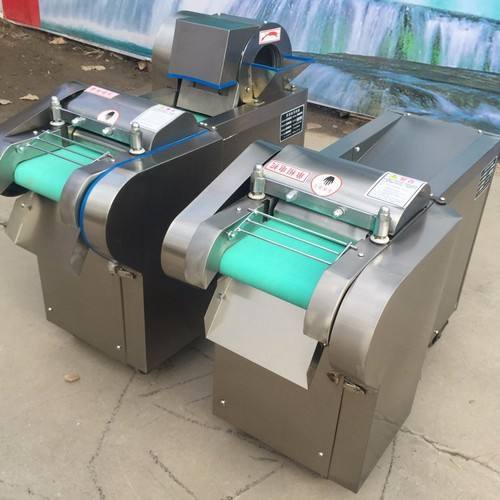
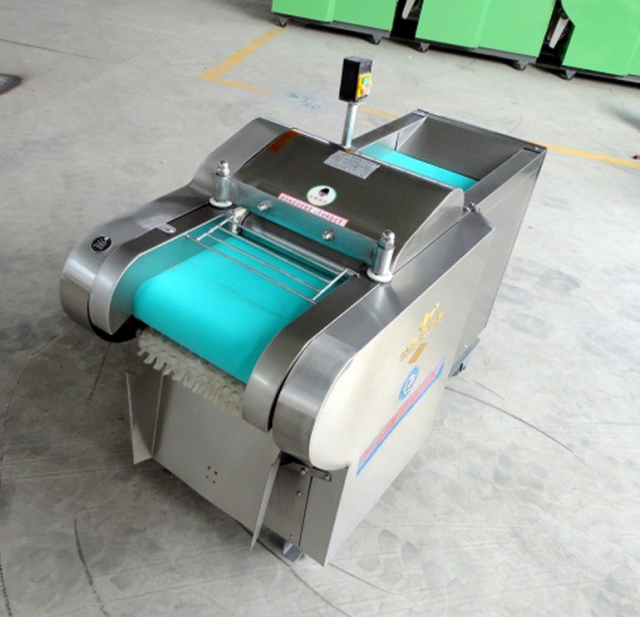
Belt width is the specification that decides how much produce can be spread across the blade at once. The narrow belt suits a single stream; the wider belt lets product enter the next stage as a layer rather than a pile. Both run on the same frame design and take the same blade assembly.
Where the machine has to join an existing line, check the belt height and the run direction first. Those two decide whether the unit drops into place or whether a conveyor section has to be reworked before it will line up.
Castors under the frame let one unit move between prep areas or be pulled out for cleaning, then lock down again for production.
Judged as an industrial vegetable cutting machine, the details that matter in a wet room are the ones a photograph cannot show: fasteners that stay tight, a frame that does not trap peel in a corner, and a belt that can be cleaned in place without a full strip-down.
Blade mounts, guard hinges and belt widths are agreed with the vegetable cutting machine manufacturer at the design stage, so a second unit ordered later behaves like the first.
Frozen Vegetable Lines
Freezing does not forgive an uneven cut. A pack that mixes thick and thin pieces thaws unevenly in the customer's pan and weighs out inconsistently on your own line, so the cut has to be the same at the end of the shift as it was at the start. Potato, yam and leafy greens are the three streams this machine handles most often in frozen production. Thickness is set per product and noted on the line sheet, so a change from one pack size to the next is a blade and setting change rather than a new setup. Placement matters as much as the cut. The unit is usually set between the washer and the blancher, with the discharge dropping onto the next conveyor or into a blancher feed hopper. That is where belt width earns its keep: a wider belt spreads the product so it enters the blancher as a layer rather than a heap, and the blanch comes out more even as a result. Throughput has to match the freezer downstream, not the other way round. Running the cutter flat out and then holding product in a tub while the freezer catches up costs you temperature control, so size the model to the line and let it run steadily. On an industrial vegetable cutting machine, hygiene between products is the other half of the job. Stainless surfaces, a blade assembly that comes out in one piece and a belt that can be wiped down mean the change from an onion run to a cabbage run does not eat the afternoon. Cut quality also drives yield. A dull blade on a vegetable slicer machine crushes leafy product and creates fines that go straight to waste, and it bruises roots so they break up later in the line. Repeatability is what frozen buyers look for when they visit: the same cut, from the same setting, whoever is on the machine that day. That is the practical argument for a fixed-gap blade over a hand knife, and it is what makes a cut specification something you can put in writing.
Kitchens & Food Service
- Prep before the rush, not during it — chili, cabbage, celery and onion are cut in the quiet hour and held for service, instead of a prep hand standing at a board while tickets build.
- One machine, several menus — strips for stir-fry, cubes for stew and soup, shreds for slaw and the salad bar, slices for sandwiches. The shape changes with the blade set, so a menu change does not mean new equipment.
- Portions that hold — the same cut size every day keeps recipe costing and plating stable, which matters most in multi-site kitchens where a portion has to look the same in every branch.
- A vegetable cutting machine for restaurant kitchens — sized to sit in a working prep area, on castors so it can be moved back against the wall, and run by one operator through a service prep window.
- Catering and central kitchens — batch work against fixed delivery windows is where a belt-fed cutter saves the most, because output stays level when four events land on the same morning.
- Where the labour actually goes — one operator feeds and checks instead of a bench of prep hands chopping the same four vegetables.
- Built for a working kitchen — a frame that can be wiped down at the end of service, a guard that lifts for cleaning, and blade sets that store on a shelf rather than in a drawer.
- What to check before it lands in your kitchen — the power point, the drain, clearance at the discharge end for a tub, and somewhere dry to keep the spare blade sets.
Models & Specifications
Before you commit to a model of this automatic vegetable cutting machine, ask for the data sheet for the frame you are considering. It repeats the capacity, dimensions, motor, slice thickness and belt width on one page you can pass to your engineer or your finance team, and it is the document the order is built against. If the machine is going into an existing line, the two views worth having are the side elevation — belt height, feed end and discharge end — and the footprint with the guard open. Both come from the same file set, and both answer the question your installer will ask first. Ask for the blade list as well. It shows every shape and thickness the vegetable dicing machine can produce on that frame, so you can check which of your products are covered before you order rather than after the first production run. The A and B versions share capacity, motor and belt width and differ in frame height, so confirm which one matches the height of your bench or conveyor before the order is fixed. The electrical schedule is the last item to pin down. The motor rating is fixed, but the supply you order is set for your site, and that detail belongs on the order rather than on a general brochure. If you want to see the cut itself, ask for sample photographs of the shapes you plan to run — and, where it helps, send us your own product so the cut can be checked against it before the machine is built.
| Model | Capacity | Dimensions (mm) | Motor | Slice thickness | Belt width |
|---|
| PH-660A | 150-660KG/H | 900 x 440 x 700 | 1.5 kW | 1-25 mm | 217 mm |
| PH-1000A | 200-1000kg/h | 1280 x 560 x 860 | 1.5 kW | 1-30 mm | 318 mm |
| PH-660B | 150-660kg/h | 900 x 440 x 800 | 1.5 kW | 1-25 mm | 217 mm |
| PH-1000B | 200-1000kg/h | 1280 x 560 x 1030 | 1.5 kW | 1-30 mm | 318 mm |
Blade Options & Cut Shapes
- Slice set — a flat blade gives clean slices across the full thickness range and is the working set for cabbage, potato, onion, celery and pepper. - Strip and julienne set — long, even strips for stir-fry lines, slaw and garnish; the width comes from the blade, not from how steady the operator's hand is. - Cube and dice set — a grid blade turns roots into cubes for soups, stews and frozen mixes, so a separate vegetable dicing machine is not needed when diced product is on the list. - Wave and rhombus sets — decorative cuts for packed fresh-cut trays, crinkle slices for snack lines and rhombus pieces for pickles and preserves. - Segmenting set for stems — leek, celery and beanstalk come out as short lengths rather than crushed pieces, which matters when the next step is blanching. - Shredding set for leafy vegetables — kelp and cabbage shred evenly; softer leaves feed better when they are cool and dry rather than straight from a warm wash. - Changeover is a swap, not a rebuild — the blade assembly lifts out as one piece and the replacement seats in the same housing. As a vegetable slicer machine it earns its place only if it gets back into production quickly, and that is exactly what the modular mount is for. - Build your set over time — start with the shapes your menu or pack runs every week; further blade sets can be added to the same frame later without a second machine. Automated feeding and blade rotation reduce manual handling, while adjustable slice thickness helps hold precise cut dimensions. Cleaning and maintenance access, together with built-in safety features, are designed to keep daily operation efficient. Produce | How it is handled --- | --- Potato, yam, carrot, eggplant | Sliced, stripped, cubed, waved or cut rhombus after the blade change Cassava | Peeled, then sliced or cut to shape Bamboo shoot, melon | Sliced and stripped Onion, garlic | Sliced Pepper, chili | Sliced or cut into strips Cabbage, kelp | Shredded, or sliced when a slice set is fitted Leek, celery, beanstalk | Segmented into short lengths Chives, mustard greens | Shredded fine with a light, even feed
Throughput & Daily Operation
- Size the frame to your peak hour, not your average — the compact frame covers smaller runs and the wider-belt frame covers continuous production, so pick the one that matches your busiest hour of the week.
- Feed evenly, not in bursts — a spread load keeps pieces square and the belt tracking true; tipping a full tub in at once gives you a mix of sizes and a heavier load on the blade.
- The operator watches, the machine cuts — powered feeding and blade rotation take the knife work out of the job and cut down the manual handling that causes most prep-room injuries.
- Set the thickness once per product — the adjustment holds through the batch, so a tray cut at the start of the shift matches a tray cut at the end.
- One commercial vegetable dicer machine, one footprint — when diced product is on the list, the dicing grid runs on the same frame as the slice and strip sets, so you are not finding floor space for a second machine.
- What keeps output steady — a sharp blade, a clean belt and an even feed. Nothing else on this machine drifts during a shift.
- Safety is a routine, not a feature list — guard down, power isolated before any blade change, and never reaching past the hopper lip. Make those three habits part of the shift start and the rest follows.
- Where a commercial vegetable cutting machine pays back — the prep hours it removes, the yield a clean cut protects, and the consistency that stops a batch being reworked or downgraded.
Changeover, Cleaning & Spares
- Time the changeover around the wash rather than after it. While the blade block is out and the belt is being wiped, the next product can be staged at the feed end, so cleaning and setup share one window instead of taking two.
- Between products, strip the blade assembly first. It holds more fragments than any other surface on a commercial vegetable cutting machine; wash it on its own, dry it, and leave the housing open while you do the belt and chute.
- Treat strongly flavoured products and known allergens as a full wash, not a rinse. Onion, garlic, chili and mustard leave oils that carry into the first kilos of the next batch; a quick wipe removes the visible pieces but not the taste.
- At the end of the shift, clean where peel collects rather than only where it shows: the guard hinge, the corners of the frame, the underside of the belt and the lip of the discharge chute. Those are the places a food-safety walk checks.
- Keep water away from the control side. Isolate the power before anything is opened, wash the food-contact surfaces, and do not put a hose on the switch, the motor terminal box or the belt drive.
- Refit dry and fully seated. A wet housing or a blade set resting a fraction high will show up as a ragged cut on the first tray, so dry the mating surfaces and check the assembly sits flush before the guard goes down.
- Hold a spare blade set as a production part, not an emergency purchase. One set in the shape you run most covers a dull edge without stopping the line; a second set makes sense when two shapes run every day, and a dicing grid is its own spare when cubes are on the list.
- Judge wear by the cut and by tonnage, not by the calendar. Sandy roots take an edge down faster than cabbage or kelp, and the first signs are bruised root faces, ragged shreds and fines in the tub; check the edge against a sample at shift start, store each set flat and labelled, and agree the recommended spare list for your product mix when you order.
Installation & Operator Support
- Send the site details first. Floor space, drain position and the supply you have, plus the belt or bench height the machine has to line up with. Access matters too: a unit going into a plant usually arrives at a loading dock, while a vegetable cutting machine for restaurant kitchens may have to pass a standard door and a service lift.
- Position and level the frame. Set it on a flat floor, lock the castors, and check that the discharge end clears your tub or the next conveyor before anything is switched on.
- Connect the power and check the direction of rotation. Confirm the supply against the plate on your unit before the first load of produce — a blade turning the wrong way is the most common commissioning problem.
- Fit the blade set and set the thickness. Seat the assembly fully, close the guard, and set the cut against a sample of the product rather than against the marking alone.
- Run a trial batch on your own produce. Cut a few kilos and check the pieces against your specification; if the cut looks ragged, change or reseat the blade rather than forcing the feed.
- Train the operators on three things. Even loading, keeping the guard down, and isolating the power before every blade change.
- Keep the technical line open. Questions during commissioning go to the people who built the unit — we keep the vegetable cutting machine manufacturer's technicians in the conversation instead of relaying messages, so a problem is answered once rather than three times.
Ordering & Delivery
- Start with one machine. Single-unit orders are normal for this range; you do not have to fill a container to buy one.
- Choose the model and the blade sets together. Tell us the shapes and thicknesses you sell, plus the dicing grid if the unit is being bought as a commercial vegetable dicer machine, so everything ships matched to the frame.
- Confirm the supply on your site. The motor rating is the same across the range, but the voltage and phase you order are set for your building, so this is agreed before the machine is built.
- Ports. Shipments leave from Shanghai or Qingdao; tell us the destination port and we will confirm the routing with your order.
- Payment. L/C, D/A, D/P, T/T, Western Union, MoneyGram and PayPal are all accepted. Confirm the exact terms for your order with your sales contact.
- Lead time. Confirm current lead time and the sailing schedule with your sales contact when you order — it moves with the model, the number of blade sets and the season.
- Packing and unloading. Machines are fixed and packed for sea freight. Ask for the packed dimensions and weight of your model so you can organise lifting equipment at the destination.
- Inspection before dispatch. Every unit is inspected before it is packed; ask for photographs or a short video of your machine at that stage if you want to see it before it ships.
- Supply capacity. Output across this range runs to around 200 sets a month, which is what makes repeat orders and multi-unit projects practical rather than one-off.
- After-sales. Installation and commissioning guidance, operator training, fault diagnosis and spare-part support come with the machine, and the response line runs 24 hours a day. Ask your sales contact to confirm the warranty terms that apply to your order.
- Built to the sheet you approve. The specification we confirm in writing is the specification the vegetable cutting machine manufacturer builds to, so the model that arrives matches the one you ordered.
Technical Support & Model Matching
Tell us your output, product size and local voltage, and our technical team will match you to the right model from the manufacturers in our supply network. We have been sourcing food processing machinery since 2017 for buyers across Europe, North America and beyond. Before shipment we confirm configuration and any light OEM or ODM requirements; after delivery we stay with you through installation and commissioning guidance, operator training, fault diagnosis and spare-part support, with a 7×24 response line.
FAQ
What types of vegetables can your vegetable cutting machine process?
This automatic vegetable cutting machine works across roots, stems and leaves, but it treats them differently. Firm roots — potato, yam, carrot, cassava, onion, eggplant, bamboo shoot — hold their shape against the blade and come out clean whether you slice, strip or cube them. Stem vegetables such as leek, celery and beanstalk go through a segmenting set and come out as short lengths rather than crushed pieces. Leafy and sheet vegetables — cabbage, kelp, chives, mustard greens — need the shredding set and a light, even feed, because a heavy handful at once gives a ragged cut. Chili and pepper sit in between: they cut cleanly when firm and cool. If you are unsure where your product lands, send a sample and describe the cut you need; that settles it faster than a list.
Can you customize the cutting shapes or blade types for different vegetable preparations?
Yes. The blade assembly is modular and interchangeable sets give slices, strips, cubes, waves and rhombus pieces, so the shape is chosen by the blade rather than by the machine. In practice we need three things from you: the shape, the thickness in millimetres and the throughput you run. A vegetable dicing machine grid, for example, is specified by the cube size you sell, not by the size of the frame. Sets can be added to the same machine later, so you do not have to decide every shape on the day you order.
How do I clean the machine between production runs?
Isolate the power first, then lift the hinged guard and take the blade assembly out as one piece. That block holds more material than anything else on a commercial vegetable dicer machine, so it gets washed and dried on its own rather than wiped in place. The belt, the discharge chute and the inside of the feed hopper are all reachable without tools. Wipe the frame down, dry the food-contact surfaces before the next batch, and refit the blade set only once it is dry and fully seated. Between strongly flavoured products — onion before cabbage, for instance — a full wash of the blade set and belt is worth the few minutes it takes.
Will it fit into a small kitchen or a tight production room?
The compact frame is the one to look at first, and the wider-belt frame adds length for the belt rather than width for the body, so measure the run from the feed end to the discharge point before choosing. Leave clear space at the discharge end for a tub or trolley, and enough room on the blade side to lift the guard and pull the assembly out. This is a common choice as a vegetable cutting machine for restaurant kitchens, where it sits on castors in a prep corner and is wheeled back at the end of service. Check the door width and any lift on the way in as well — that catches more buyers than the machine's own footprint does.
What should I keep on hand for blade wear?
Blades are wear parts, and they dull at a rate that depends on what you cut — sandy root vegetables take more off an edge than cabbage does. Keep one spare set in the shape you run most, and check the edge at the start of a shift rather than waiting for the cut to look ragged. On any vegetable slicer machine the blade is what decides cut quality, so a dull one shows up first as bruised leaves and ragged strips. Changing a set takes minutes; ask your sales contact about a spare set matched to the model and thickness you order.
How consistent is the cut across a long shift?
The cut dimension is fixed by the blade set and the gap behind it, so it does not drift with the operator. On an industrial vegetable cutting machine the two things that do change during a shift are blade sharpness and how evenly the belt is fed. A steady, spread load keeps pieces square; tipping produce in bursts gives you a mix of sizes and a heavier load on the blade. Set the thickness once per product, check the first few pieces after each changeover, and the rest of the batch follows.